
November 13, 2026
Explore: Style
How Should a Dress Shirt Fit? A Men’s Guide to Collar, Chest and Sleeves
Check dress shirt fit at the collar, shoulders, chest, sleeves and hem. Learn what to measure, how to test movement and when to try another cut.
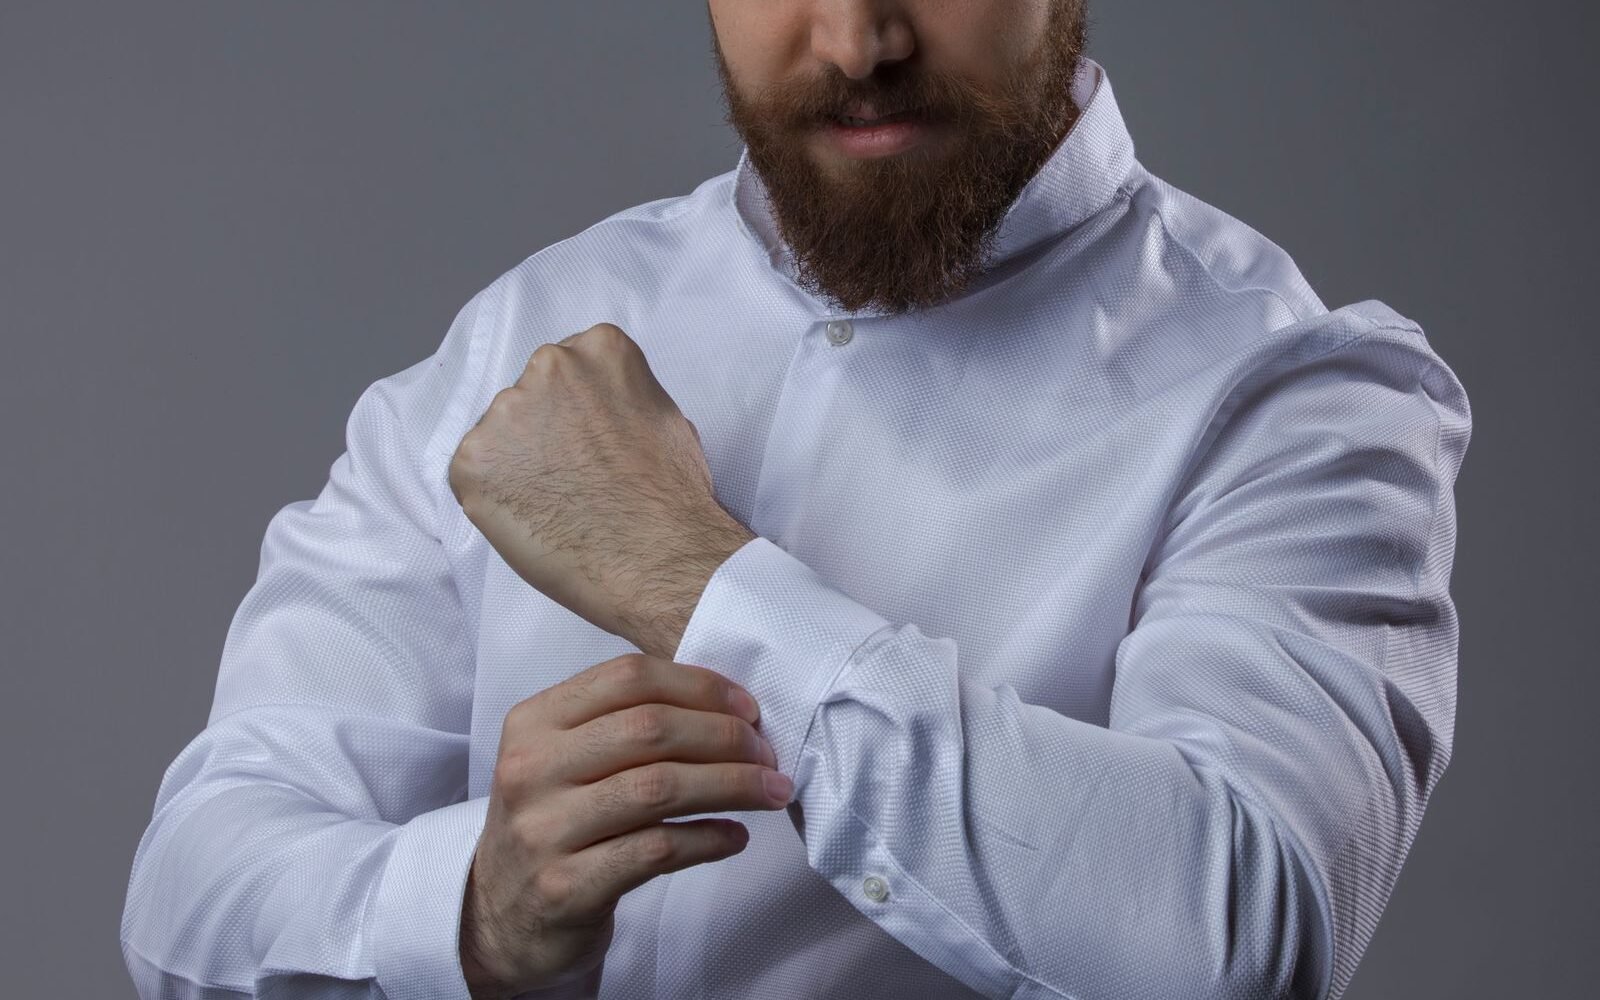
A dress shirt can have the right number on the collar and still pull across your chest, swallow your hands or bunch above your belt. Dress shirt fit is not one measurement. It is how the collar, shoulders, body, sleeves and hem work together when you move. Start there, not with whether the label says slim, regular or tailored.
The aim is a shirt you can wear through a real day. You should be able to button it for the occasion, sit down, reach across a desk and put on your jacket without spending the afternoon adjusting yourself. A clean silhouette is useful. A clean silhouette that only exists while you hold your breath is not.
The short answer
A dress shirt should close comfortably at the neck, sit cleanly across the shoulders and have enough room through the chest and abdomen to sit and reach without the buttons straining. Sleeves should reach your preferred wrist position without swallowing your hands, and cuffs should stay comfortable with your watch. A shirt worn tucked needs enough length to stay inside your trousers during normal movement. Check the intended cut and the maker's measuring instructions before choosing a size.
Dress shirt fit: check these six places first
Work from the top down. Do not tuck away a problem at the waist before checking whether the collar, shoulders or chest are creating it.
| Checkpoint | What you want | What to investigate |
|---|---|---|
| Collar | Comfortable closed if you wear a tie | Pressure, restricted movement or a large gap |
| Shoulders | A smooth start to the sleeves in the intended cut | Seams falling far away from the intended shoulder position |
| Chest and abdomen | Buttons close without persistent strain | Gaping, strong pull lines or restricted sitting |
| Sleeves | Usable reach and a comfortable wrist position | Cuffs disappearing into your hands or pulling sharply up |
| Cuffs | Comfortable around wrist and watch | Pinching or sliding excessively onto the hand |
| Hem | Length that suits tucked or untucked use | Repeatedly pulling free or excessive fabric below the jacket |
Those are clues, not diagnoses. A diagonal wrinkle does not tell you exactly which measurement to change. Shoulder slope, posture, fabric, armholes and the way a shirt was pressed can all affect what you see. Use the checklist to narrow the problem, then compare another size or cut rather than making a rule out of one wrinkle.
Try it the way you will actually wear it
Put on the undershirt, trousers and watch you expect to use. If the shirt is for a suit, bring the jacket too. A shirt that is comfortable by itself may feel different with another layer underneath or a close-fitting jacket over it.
Button the collar if you will wear a tie. If the shirt is purely for open-collar wear, check that configuration as well. Do not buy an uncomfortable collar for a future tie occasion on the assumption that leaving it open today solves the problem. You are buying for the job the shirt needs to do.

Start with the collar, not the word “slim”
The collar is where a small mismatch becomes hard to ignore. When buttoned, it should allow comfortable breathing, swallowing and head movement. You should not need to pull it away from your neck to feel normal. Nor should you be depending on a tie knot to disguise an obviously oversized opening.
Proper Cloth uses a one-to-two-finger check as a practical collar guide. That is a starting point from one shirtmaker, not a precision standard that works identically for everyone's fingers and neck. Judge comfort and the maker's sizing method together. Do not keep tightening a collar because a photograph looks neat.
Collar shape and collar size are different choices. A spread collar and a button-down collar can have the same neck size but stand differently. A collar that flares when open may reflect its construction rather than a shirt that is too large everywhere. Check how it behaves with the number of buttons you normally leave undone.
If the collar fits but the body is too loose, try another fit in the same neck size before going down a whole size. Reducing the neck to solve a roomy waist can create a new problem you cannot comfortably wear. Likewise, a comfortable body does not make a painfully tight collar acceptable.

Shoulders: match the intended sleeve construction
For a conventional set-in dress shirt, look for the seam near the transition from the shoulder into the upper arm. Think of this as an area to assess, not a tiny anatomical dot that every shirt must hit. The sleeve should begin cleanly, with room to move and without a large section of unwanted fabric hanging down the arm.
This check does not apply in the same way to a deliberately dropped shoulder or a raglan sleeve. Those are design choices, not automatic evidence of poor fit. Most traditional dress shirts use a set-in sleeve, but the garment in front of you still deserves a proper look.
Stand naturally and let your arms hang. If you push your chest forward or pull your shoulders back for the mirror, you are fitting the shirt to a pose. Then reach forward as if holding a steering wheel. Some creasing is normal. Painful restriction or a shirt that drags strongly across the upper back deserves another size or cut.
Shoulder width is only one part of the picture. The angle of your shoulders and how the shirt is cut through the armhole matter too. Our shoulder fit guide goes deeper into width, slope and intentional volume. Use this article for the whole dress shirt rather than turning every fit problem into a shoulder problem.

Chest, abdomen and back: room without button strain
Look at the front while standing, then while seated. The placket, which is the strip holding the front buttons, should lie reasonably smoothly. Persistent gaps that expose the layer underneath, or strong lines pulling outward from the buttons, can point to insufficient room. They do not automatically mean you need a larger collar and longer sleeves.
Your abdomen matters as much as your chest. A shirt can fit across the upper torso and still strain when you sit. Check around the fullest part of your abdomen, not only the narrowest part of your waist. Let your stomach relax. The shirt is meant for your body as it is throughout the day.
A little fabric is not failure. Woven shirts need room for movement, and regular or classic cuts intentionally carry more volume than close-fitting styles. If the front stays calm, you can reach comfortably and you like the silhouette, do not remove every fold simply to make the shirt look tighter.
At the back, distinguish temporary movement wrinkles from fabric that persistently catches or pulls when your arms return to rest. A back pleat can provide intentional volume. Darts can shape the waist. Neither feature guarantees that the shirt fits you, and neither makes it inherently better than a shirt without it.
When the chest fits but the waist balloons, compare a different cut. When the waist fits but the chest strains, compare a cut with more upper-body room. A different pattern can work better than chasing size labels up and down. There is no universal slim-fit shape shared by every brand.

Sleeves and cuffs: judge them together
With your arms relaxed, the sleeve and cuff should end where you want the wrist coverage to sit. Then bend your elbows, reach forward and bring your hand toward your face. The cuff will move. The question is whether that movement feels normal or whether the sleeve becomes a restraint.
A cuff that is too loose can slide down over the hand and make a sleeve look longer than it really is. A cuff that is too tight can stop the sleeve in place while the fabric pulls elsewhere. Check both before deciding that sleeve length alone is the issue.
Try your watch under the cuff if that is how you wear it. Fasten the actual cuff button you plan to use. For French cuffs, try the cufflinks too. The finished cuff needs comfortable room for the way it closes; an unfastened cuff cannot tell you the whole story.
If you wear a jacket, assess the sleeve relationship with both garments on. A little visible shirt cuff is a common tailoring preference, but a particular fraction of an inch is not a universal requirement for every outfit. Your jacket sleeve can be the source of an odd-looking relationship even when the shirt is fine.
Do not choose sleeves solely from a photograph of someone holding their arms rigidly at their sides. Fit changes when you work, drive or reach. You do not need unlimited athletic range from a formal shirt, but you do need enough mobility for its intended use.

Length: tucked and untucked are different jobs
A dress shirt intended for tucking usually needs more coverage than one designed to sit neatly outside trousers. Test it with the trousers you will wear, because waistband height affects how much shirt is held in place. A shirt that stays tucked into a higher rise can behave differently with a lower rise.
Tuck it, sit down, stand up and reach forward. Some movement and a little adjustment are normal. If it pulls free during ordinary use, check length as well as tightness through the torso and armholes. More length alone may not solve a shirt being dragged upward by restricted movement.
For untucked wear, look at the entire outfit rather than adopting a fixed hem rule. The hem should look intentional with your height, trousers and proportions. Long formal tails can be awkward untucked, even if the collar and chest fit beautifully. A shorter casual button-front shirt may be a better choice for that outfit.
Do not buy one shirt expecting it to be perfect for every use. A formal shirt for a suit and a relaxed shirt worn with grey trousers and sneakers can justify different lengths and volumes. You can build a small wardrobe without asking every piece to do incompatible jobs. Our capsule wardrobe guide helps separate actual needs from hopeful purchases.

Dress shirt fit measurements: compare like with like
Before ordering, identify whether the seller wants body measurements or measurements taken from an existing shirt. Those are not interchangeable. A garment includes room beyond the body, while a body chart may already have the maker's intended allowance built into its recommendation.
Start with a shirt you already like, preferably one that has been washed according to its label and fits in the way you want the next shirt to fit. Record the brand, cut and whether you normally tuck it. A very oversized casual shirt is not a useful template for a close-fitting formal one unless that difference is intentional.
Neck and sleeve measurements
Follow the retailer's own neck instructions. Charles Tyrwhitt, for example, describes measuring around the neck with two fingers between the tape and neck. Do not combine that method with a second allowance borrowed from another seller. You could accidentally count the extra space twice.
Sleeve methods vary too. Charles Tyrwhitt measures from the center back below the collar, across the shoulder and down the arm. Some garment charts use a shoulder-seam-to-cuff measurement instead. The same number means different things if it starts in a different place. Write down the starting point beside the number.
Flat shirt measurements
Button the shirt and lay it flat without stretching. For chest width, follow the maker's instructions about where the measurement crosses the underarms and how to arrange any back pleats. For shoulder width, compare the specified seam-to-seam points across the back. For length, identify the exact starting point at the collar and the endpoint at the hem.
Proper Cloth's garment instructions explicitly separate chest width, midsection width, shoulder width, cuff and back length. That is more useful than a single “medium” label because it shows which part is different. The method still needs to match the store you are buying from.
Do not automatically double every measurement. Doubling a flat chest width can approximate garment circumference, but it does not turn it into your body chest measurement. A chart that asks for flat width should receive flat width. Our body versus garment chest guide explains the distinction with more measuring detail.
Slim, regular and tailored fit: labels are not standards
One brand's slim can be roomier than another brand's regular. Even within a brand, different shirt families may use different patterns. Read the measurements for the specific style, not only the label on another shirt you own.
A slim cut often reduces volume through the body, but that does not tell you exactly how much room remains in the chest, waist or upper arm. An athletic label may suggest more upper-body room and a tapered waist, yet you still need the actual chart. Neither word is a promise about your proportions.
When comparing two options, keep as many variables the same as possible. Try the same collar and sleeve size in two cuts. If one solves the waist without creating chest strain, you have learned something useful. Changing the neck, sleeve, cut and fabric at once makes it harder to know why one works.
Stretch is not a substitute for fit. A stretch shirt can move comfortably, but the buttons should not depend on constant fabric tension to stay closed. Non-stretch woven fabric may need a different amount or distribution of room. Judge the actual garment instead of assuming a fiber percentage will solve the problem.

The fitting-room test you can repeat
First, fasten the shirt as you intend to wear it. Check the collar, cuffs and watch. Let your arms hang and look at the front, side and back without changing your normal posture.
Second, sit fully in a chair. Look for new pressure at the neck, chest or abdomen. Lean forward as if working at a desk. You are not trying to break the shirt; you are checking the movements your day actually includes.
Third, reach forward and bend your elbows. Put the jacket on if the shirt is for one. Notice whether the sleeves and armholes allow ordinary movement and whether the jacket changes the feeling across the back.
Finally, tuck or untuck it for the intended outfit and repeat the sit-and-stand movement. Check whether the hem stays useful and whether excess fabric is something you dislike or simply the normal volume of that cut. Take a photograph only after doing the movement test. A mirror tells you about appearance; movement tells you whether you will wear it.
What to try before paying for alterations
If the shirt is new and returnable, compare another cut before altering it. An exchange can be the simpler answer when several areas are wrong. Check the return terms before washing, removing tags or having work done.
A tailor may be able to reduce some excess body volume or adjust sleeves, depending on construction and the amount of change. Ask for an assessment and quote rather than treating darts or sleeve shortening as guaranteed fixes. Cuffs, plackets, seam allowances and overall proportions can limit what makes sense.
Be especially cautious about buying a shirt with a wrong collar or shoulder fit because everything else seems close. Those changes can be more involved, and there may not be enough fabric to create the room you need. Compare the alteration cost with a shirt that starts closer to your requirements.
Do not try to shrink a shirt into a different pattern. Washing cannot selectively fix a roomy waist while preserving the exact collar and sleeve you like. Follow the care label. If a maker supplies specific shrinkage information, use that information for that shirt, not as a rule for all cotton.

Keep a small fit record, not a drawer of mistakes
After finding a shirt that works, record its exact style, collar, sleeve, fit name and useful garment measurements. Note whether it works with a tie, whether it stays tucked and how it feels after normal laundering. Keep the notes with a few clear photographs rather than relying on memory when the next sale appears.
If something changes after washing, compare the same points you measured before. A different pressing method can change how the shirt looks without proving that every dimension shrank. Measure before deciding what happened, and contact the seller if the result seems inconsistent with the stated care or product guidance.
For sensitive skin, also notice collar edges, seams, labels and any irritation during wear. A fabric name alone does not guarantee comfort. Do not persist with a shirt that bothers your skin just because its measurements look correct. Fit is useful only if the garment is comfortable enough to wear.
The best shopping note is specific: “collar comfortable closed, sleeves good, body too roomy at waist.” That gives you a next step. “Dress shirts never fit me” gives you nowhere to go. Your body is not the error. Find the pattern, size and details that work for it.
Frequently asked questions
How tight should a dress shirt collar be?
It should close comfortably without restricting breathing, swallowing or head movement. Proper Cloth suggests room for one or two fingers as a practical check, but finger size and measuring methods vary. Use comfort and the shirtmaker's own instructions together, especially if you will wear a tie.
How do you know if a dress shirt is too small?
Persistent button gaping, uncomfortable pressure or restricted sitting and reaching can point to too little room. Check the chest, abdomen, upper back and sleeves together. A different cut may work better than increasing every dimension with a larger size.
Should a dress shirt be tight or loose?
Neither extreme is a universal goal. It should have enough room for normal movement without unwanted excess for the style you want. Slim, regular and tailored labels vary by brand, so compare actual measurements and try the shirt seated as well as standing.
Where should dress shirt sleeves end?
At the wrist position that works comfortably with the cuff fastened and your intended outfit. Check relaxed arms, bent elbows and reaching, and try your watch and jacket if you wear them. Cuff width can change how long the sleeve appears, so assess both together.
Put the shirt to work
Start with the collar and shoulders, then check chest, abdomen, sleeves, cuffs and length. Compare the maker's measurements with a shirt you already trust. Finish with sitting and reaching, not a still pose. The right shirt should leave you thinking about your day, not the next chance to unbutton it.
For a reusable place to record your measurements, see Size & Fit Reference. For a casual knit top instead, use our separate men's T-shirt fit guide. A dress shirt and a tee do not need the same fit checklist.
Pair the shirt with trousers that move comfortably too. Our dress pants fit guide covers waist, rise, seat and hem break.
Sources
- Charles Tyrwhitt: How to Measure for a Shirt. Manufacturer-specific neck, sleeve and garment measuring methods.
- Proper Cloth: How to Measure a Dress Shirt. Garment measurement points and comparison method.
- Proper Cloth: How Snug Should a Shirt Collar Fit. Collar comfort and the manufacturer's finger check.
This guide combines cited shirtmaker instructions with Kalm King's practical styling recommendations. Fit preferences are not universal sizing standards.
FIELD NOTES
Get the Overalls Fit Kit, free.
Your measurement card, the six fit checkpoints and a checklist to take shopping. Join Field Notes for new guides and a say in what Kalm King makes.
THE KALM KING JOURNAL
Continue reading
How Should Men’s Dress Pants Fit? Waist, Rise, Seat and Break
How should dress pants fit? Check the waist, rise, seat, thighs and hem with practical sitting tests, break options and realistic tailoring advice.
Men’s Capsule Wardrobe: How to Build One That Actually Works
A men’s capsule wardrobe is a small set of clothes that all work together. How to choose the pieces, colors and fit, and build one at your own pace.

Does Cotton Shrink? Jeans, Hoodies, Chinos and Overalls
Does cotton shrink? Often a little. How jeans, hoodies, chinos and overalls behave, what preshrunk means, and how to wash and dry to limit it.